


Level 4: Bullseye
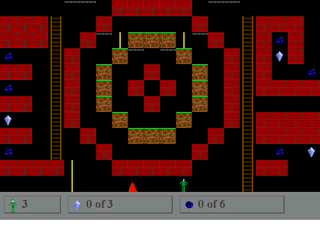
This level requires good knowledge of how holes work, and some fancy recovery techniques but can be completed in a leisurely fashion once the slime is taken care of.
The level starts out with a slime very close to you so you have to move fast. Run to the ladder and climb up to the first brick platform running to where the portable hole is. As soon as you grab the portable hole, drop it to the left and watch the slime be destroyed. Some of you may be wondering if losing a hole at this point in time is wise. Well, it does add a bit of work, but not having to worry about the slime is worth more to me.
Jump off the platform and head to the rope on the left. Climb up the rope to the brick platform and get the portable hole. Back to the ladder on the far right. Climb up to the top of the ladder and drop the hole over the portable hole and energy crystal. Drop down. Get the other hole at the bottom and use a hole to get out of that area. Now comes the tricky hole reuse bit. Climb back up to the top and recover the hole. Place it in the corner next to the ladder. Climb down the first notch and drop a hole. Climb back up a notch and recover the top hole. Move down two notches and drop a hole. Up a notch and recover a hole then down two steps and drop the hole. You should now be able to recover the hole that you used to escape the area. Recover the two holes along the ladder. You should now have three holes.
Climb down the ladder and head to the rope. Climb the rope then the ladder to the double thick platform on the top left of the screen. In the left edge drop a hole. Move back a space and drop a second hole. Jump into the holes ad drop a hole. Jump down and recover the portable hole. Drop a hole but make sure it is not directly under the hole you fell through. Drop down and get the hole. Drop a hole, again making sure it is not directly under the hole you fell through. Grab the energy crystal and work your way back to the top. Jump through the double hole and through the hole on that platform and recover the hole. Repeat this for the higher up platform. Then return to the top of the ladder and drop the hole immediately. You can now recover the hole you dropped in the lower half of the brick. Once you have that hole, recover the one by the ladder, then the one next to it, and finally the one to the left edge. You now have all five of the remaining holes (the sixth hole was permanently destroyed, remember).
Now do the V trick to get the energy crystal on the other side, but only worry about recovering the top two holes as you only need 3 holes to reach the gate. Climb to the top of the ladder and across the chain. Drop a hole and drop onto the chain. Cross the chain and climb the rope then drop a hole. Drop onto the chain. Drop the final hole on the top center brick and cross over the hole dropping to the exit.
| Previous Level | Mr. Holeman Set 3 Walkthrough Level 4 |
About -
Privacy Policy -
Contact -
Links -
FAQ
Copyright © 2005-2006 Blazing Games Inc. All Rights Reserved.